Are you struggling to make the most out of your affiliate program?
If your current commission setup only uses a one-size-fits-all approach, you might be missing out on key opportunities to engage and incentivize your top-performing affiliates.
In this guide, we’ll show you how to set different commission rates for different affiliates using WordPress.
By tailoring commission structures to fit the needs and performance levels of various affiliates, you can motivate them more effectively and boost your overall sales.
Let’s get started!
Why Set Different Commission Rates for Different Affiliates
It’s a challenge to keep your affiliates motivated and engaged.
And it’s a bigger challenge when you never get creative with your commission rates even when some of your affiliates work harder than others.
Setting different commission rates for different affiliates can be a game-changer for your affiliate program.
Not all affiliates are the same; some might bring in high volumes of sales, while others might excel in promoting high-value products.
By understanding and implementing different commission rates, you can create a dynamic and motivating environment for all your affiliates.
Now, let’s explore how you can set these rates in your WordPress affiliate program.
Steps To Set Different Commission Rates for Affiliates
Assigning different commission rates for different affiliates is a breeze with AffiliateWP.
Just follow the below steps and treat your business with higher profits and more sales:
Step 1: Install AffiliateWP
Start by installing AffiliateWP.
AffiliateWP is the best affiliate plugin for WordPress. It is user-friendly, feature-rich, and seamlessly integrates with your website.
It makes managing your affiliate program straightforward and efficient, allowing you to focus on what matters most – growing your business.
To get started, visit the AffiliateWP pricing page and select the plan that best fits your needs.
With various options available, you can choose the one that aligns with your business goals and budget. Also, remember that you can always upgrade later if you want to.
Once you’ve purchased the plan, log in to your WordPress dashboard and navigate to the Plugins tab.
Click on Add New, then upload the AffiliateWP plugin file. After uploading, click Install Now and then Activate.

For more information, please see our detailed installation guide.
Step 2: Complete Setup Wizard
After installing and activating the plugin, the AffiliateWP setup wizard will guide you through configuring your affiliate program.
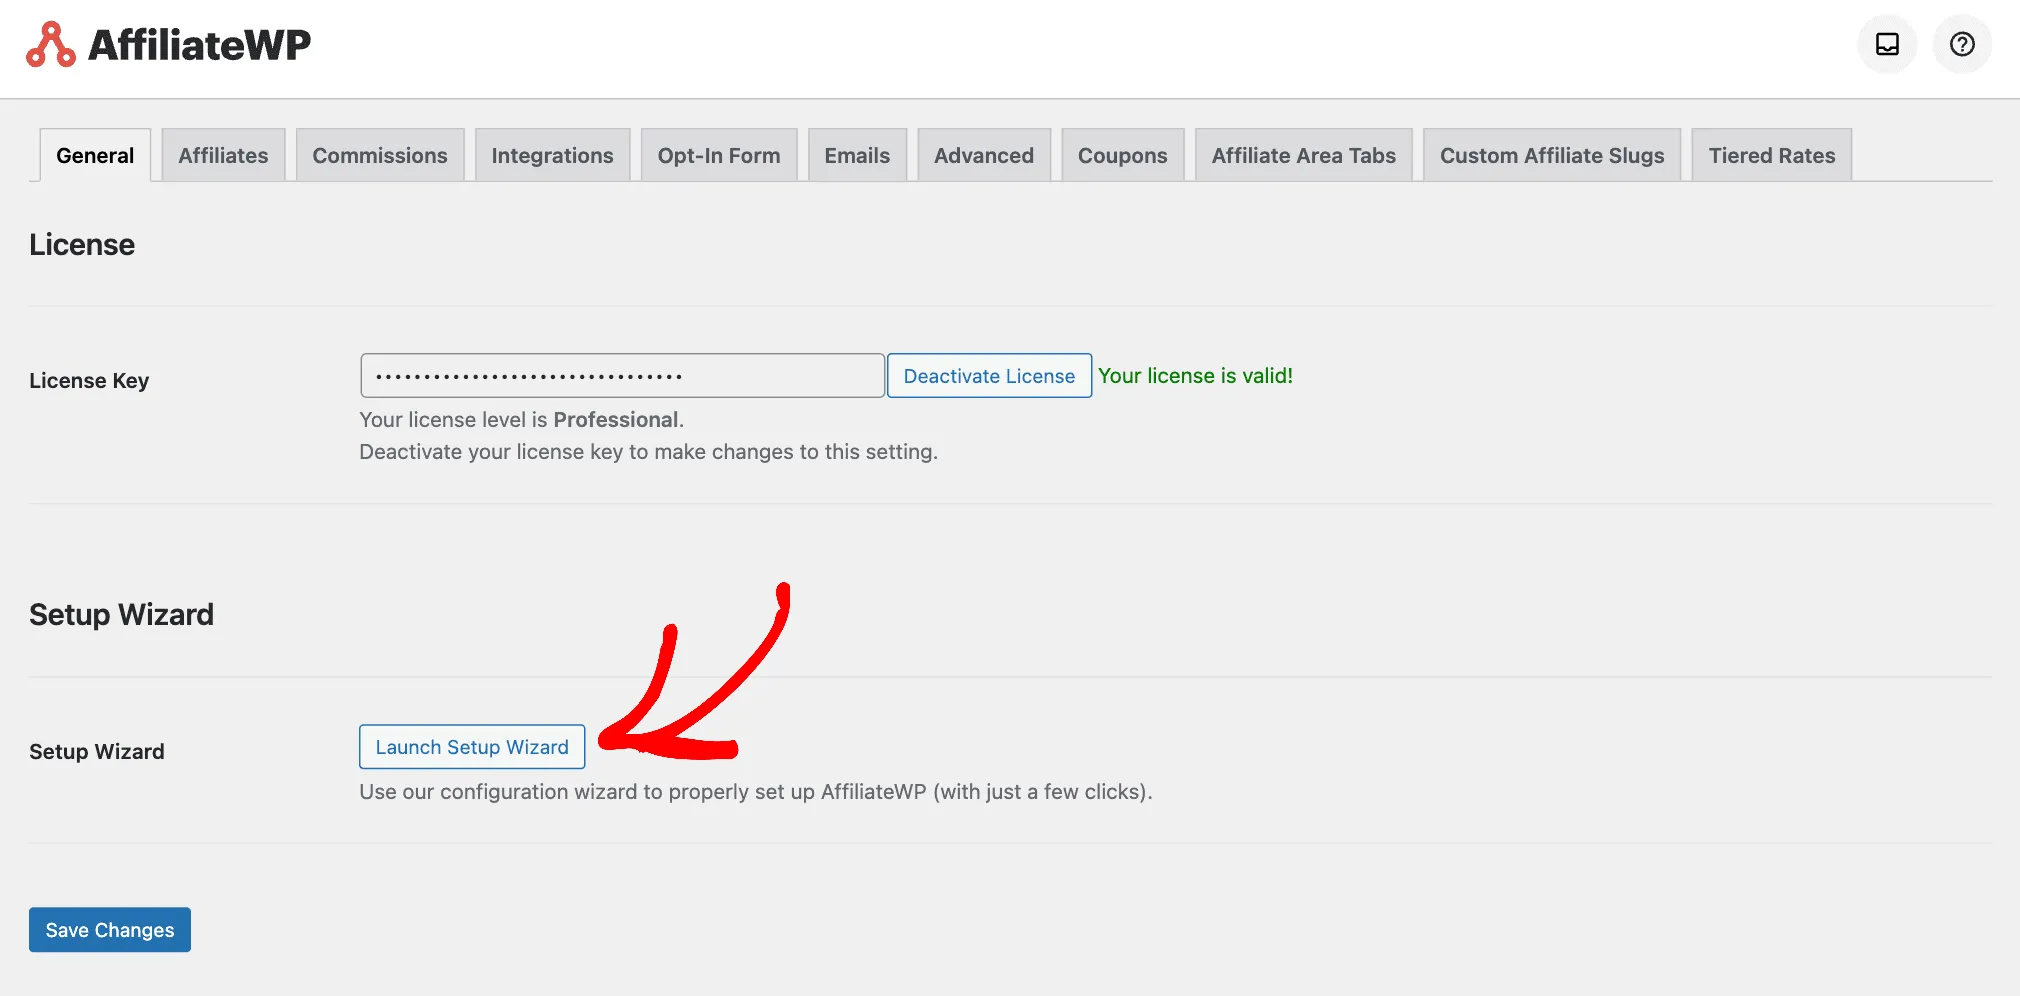
Access the setup wizard by hovering over AffiliateWP in the left-hand sidebar of your WordPress dashboard and clicking on Settings. Scroll to the bottom of the page and select Launch Setup Wizard.
You will be prompted to enter your license key, which you can find in your confirmation email or AffiliateWP account.
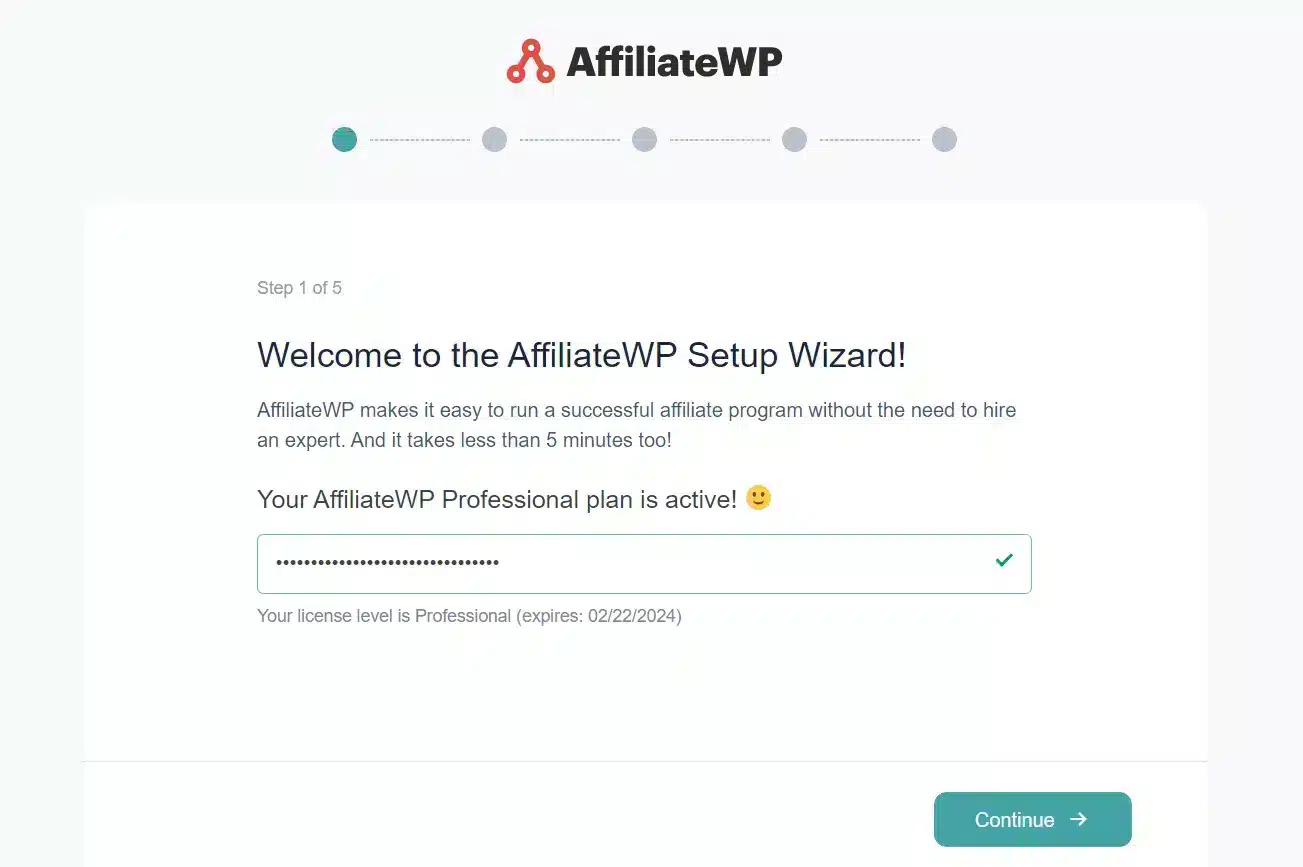
Copy the key, paste it into the designated box, and click Continue.
The setup wizard will then guide you through integrating AffiliateWP with your preferred e-commerce or membership plugin.
Over 15+ integrations are available, including popular choices like WooCommerce, Easy Digital Downloads, and MemberPress. You can select the one that works best for your website.
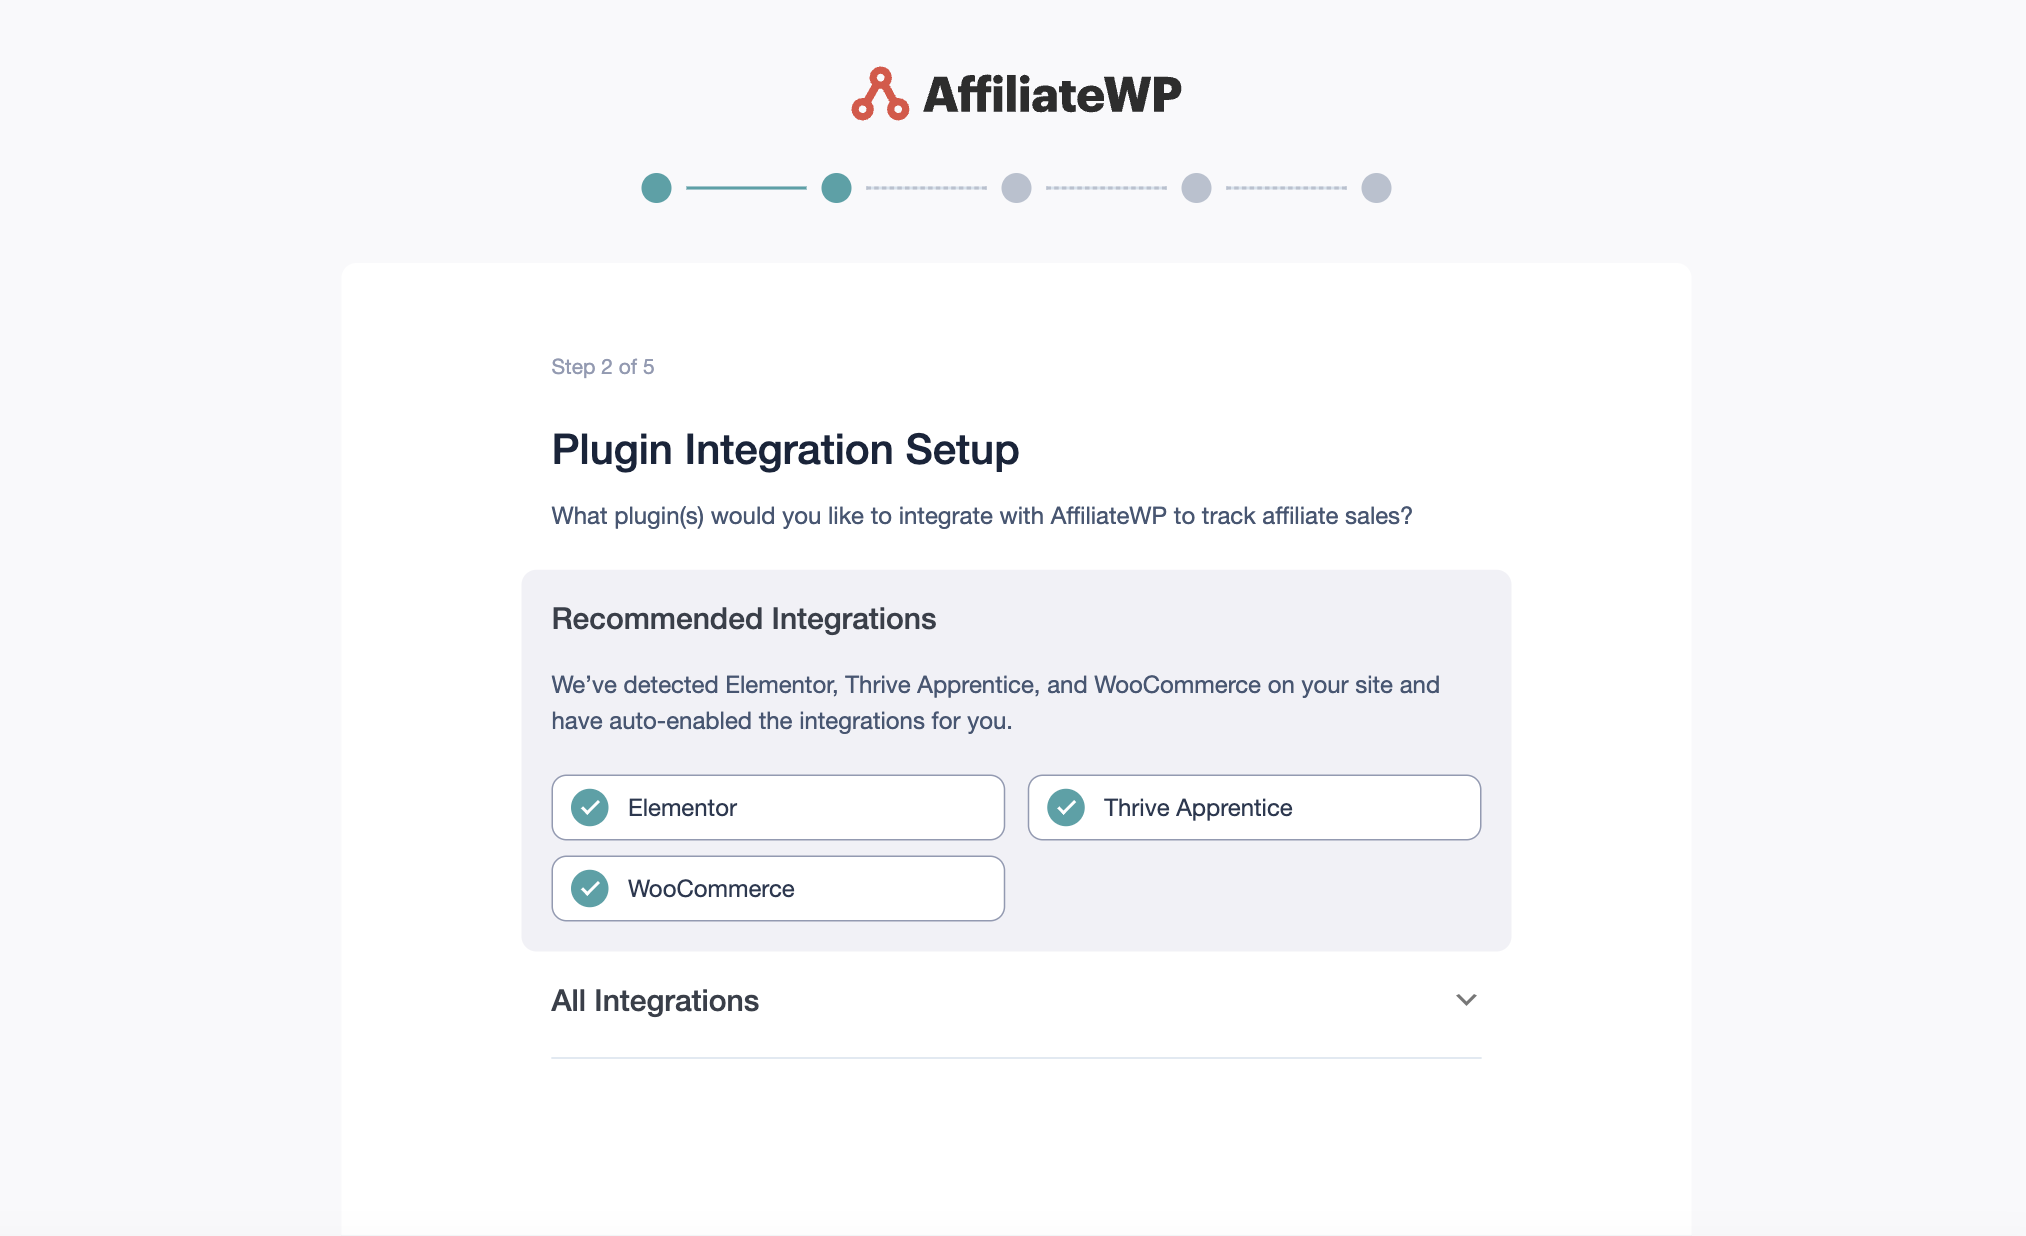
Check the box next to your desired integration and click Continue.
Next, you will configure some basic settings, such as currency, referral type (fixed rate or percentage of the total value of the sale), and referral amount.
Input the necessary information and click Continue.
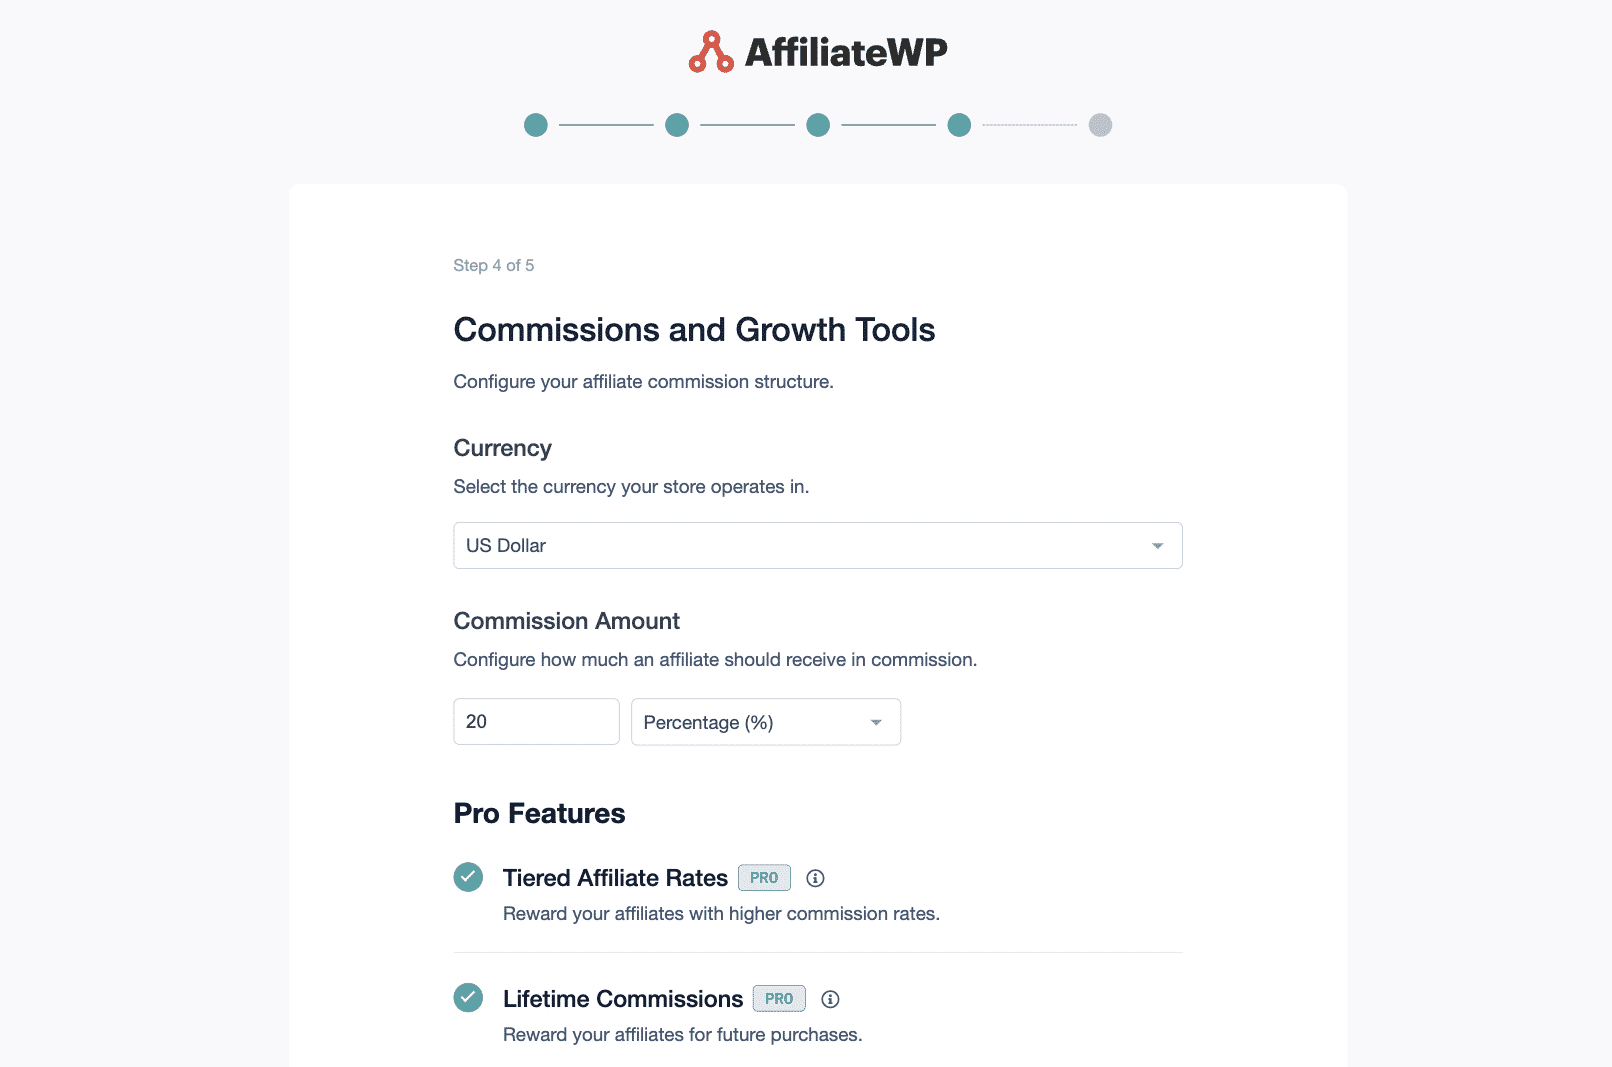
These settings can be adjusted later in the AffiliateWP Settings tab.
Finally, click Finish Setup and Exit to complete the setup process and exit the Setup Wizard.
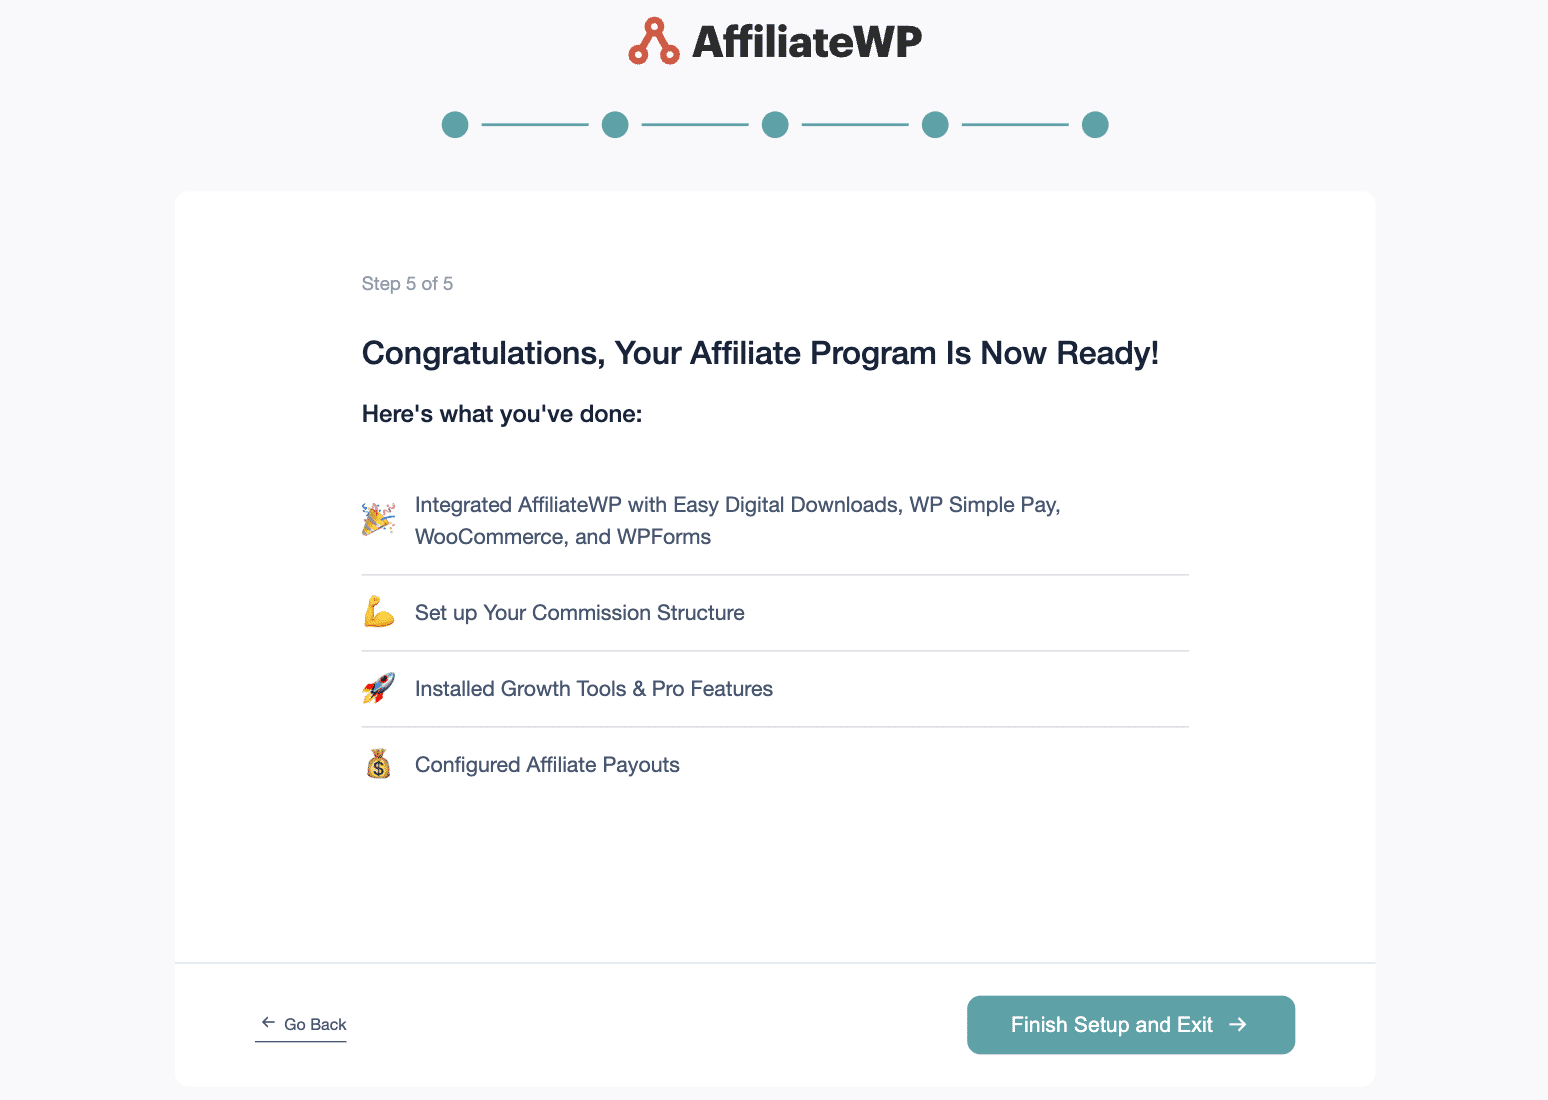
Now, your AffiliateWP is configured and ready for you to start setting different commission rates for different affiliates.
Step 3: Start Creating Affiliate Groups
Now it’s time to create your affiliate groups.
Affiliate groups allow you to easily add different affiliates into groups and set custom rates, making it simple to tailor your program to meet various needs and performance levels.
To start, click on Affiliates and then on the Groups tab. You will be presented with a simple form to fill out.
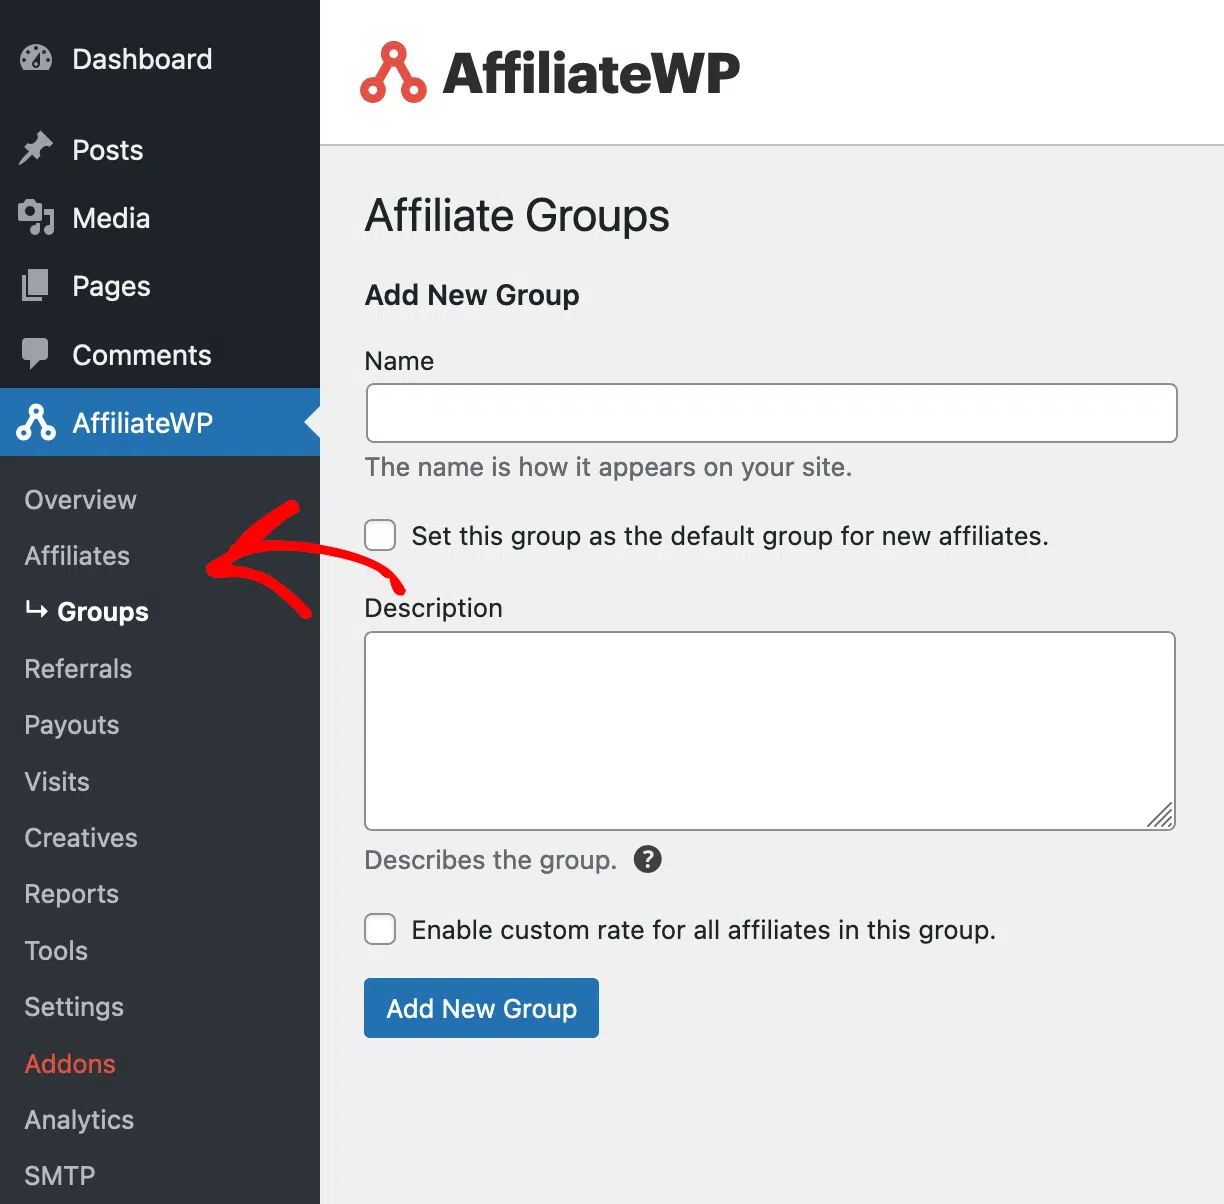
First, enter a name and description for the group. The name will be displayed on your site and help you identify the group. The description is only for your reference and will be displayed in the admin area.
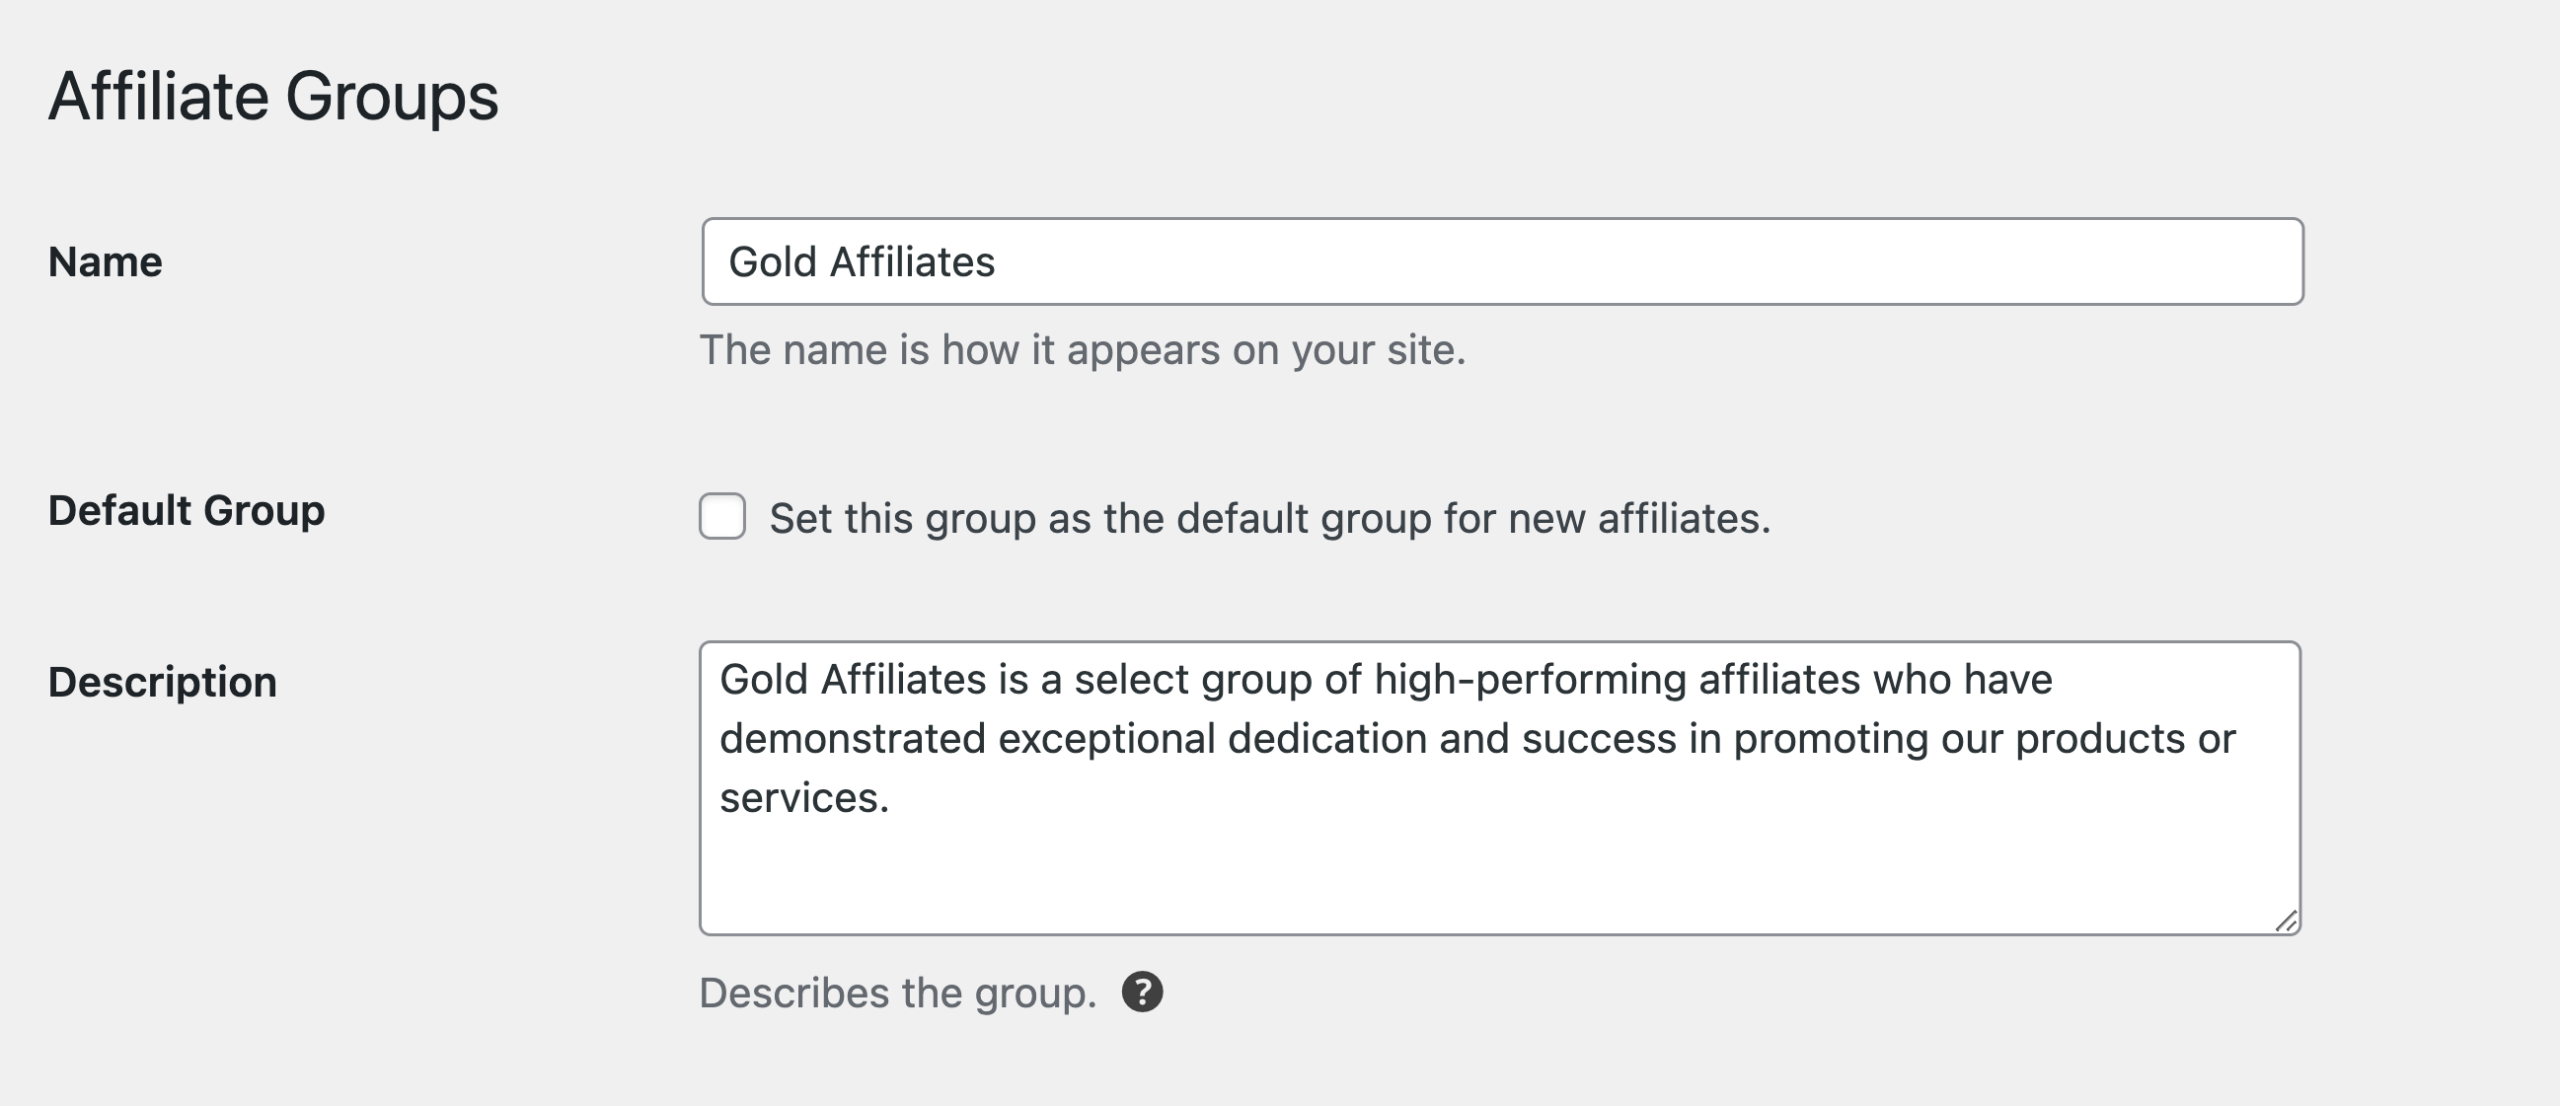
If you want new affiliates to automatically join this group, check the box that says Set this group as the default group for new affiliates.

Next, you can enable a custom referral rate for all affiliates in this group by checking the box that says Enable custom rate for all affiliates in this group.
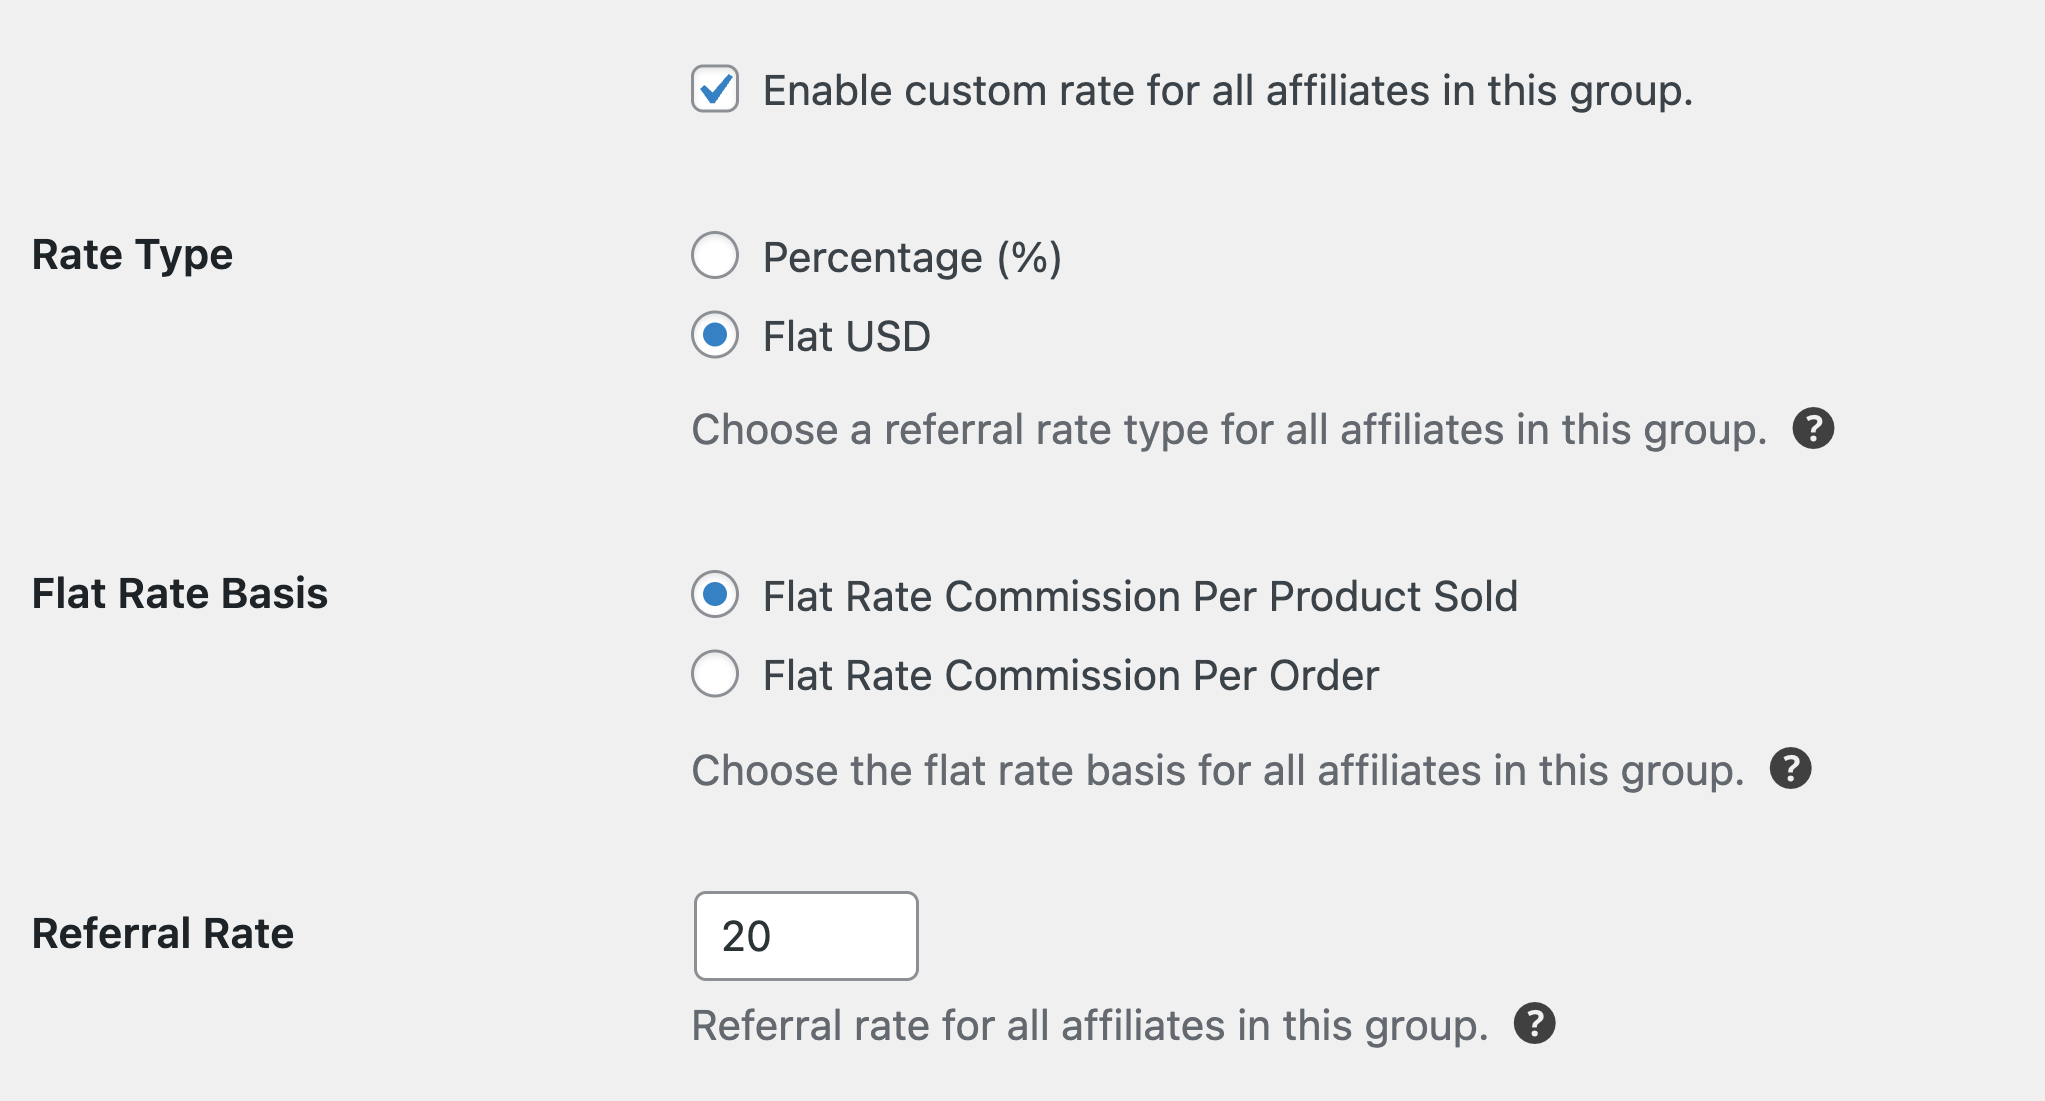
This will override the global and per-affiliate rate settings. When enabling the custom rate, you can set the referral rate and choose whether to use a percentage or a flat rate.
Once you have completed the form, click Add New Group to create the group.
After you have created and saved the new group, it will be shown in the list when navigating to AffiliateWP » Affiliates » Groups.
Step 4: Add Affiliates to Groups
With your affiliate groups created, you can now add affiliates to them. To do this, click on Affiliates to see the list of your affiliates.
To add an affiliate to a group, find the affiliate you want to add and click on their name. This will take you to the edit screen for that affiliate.
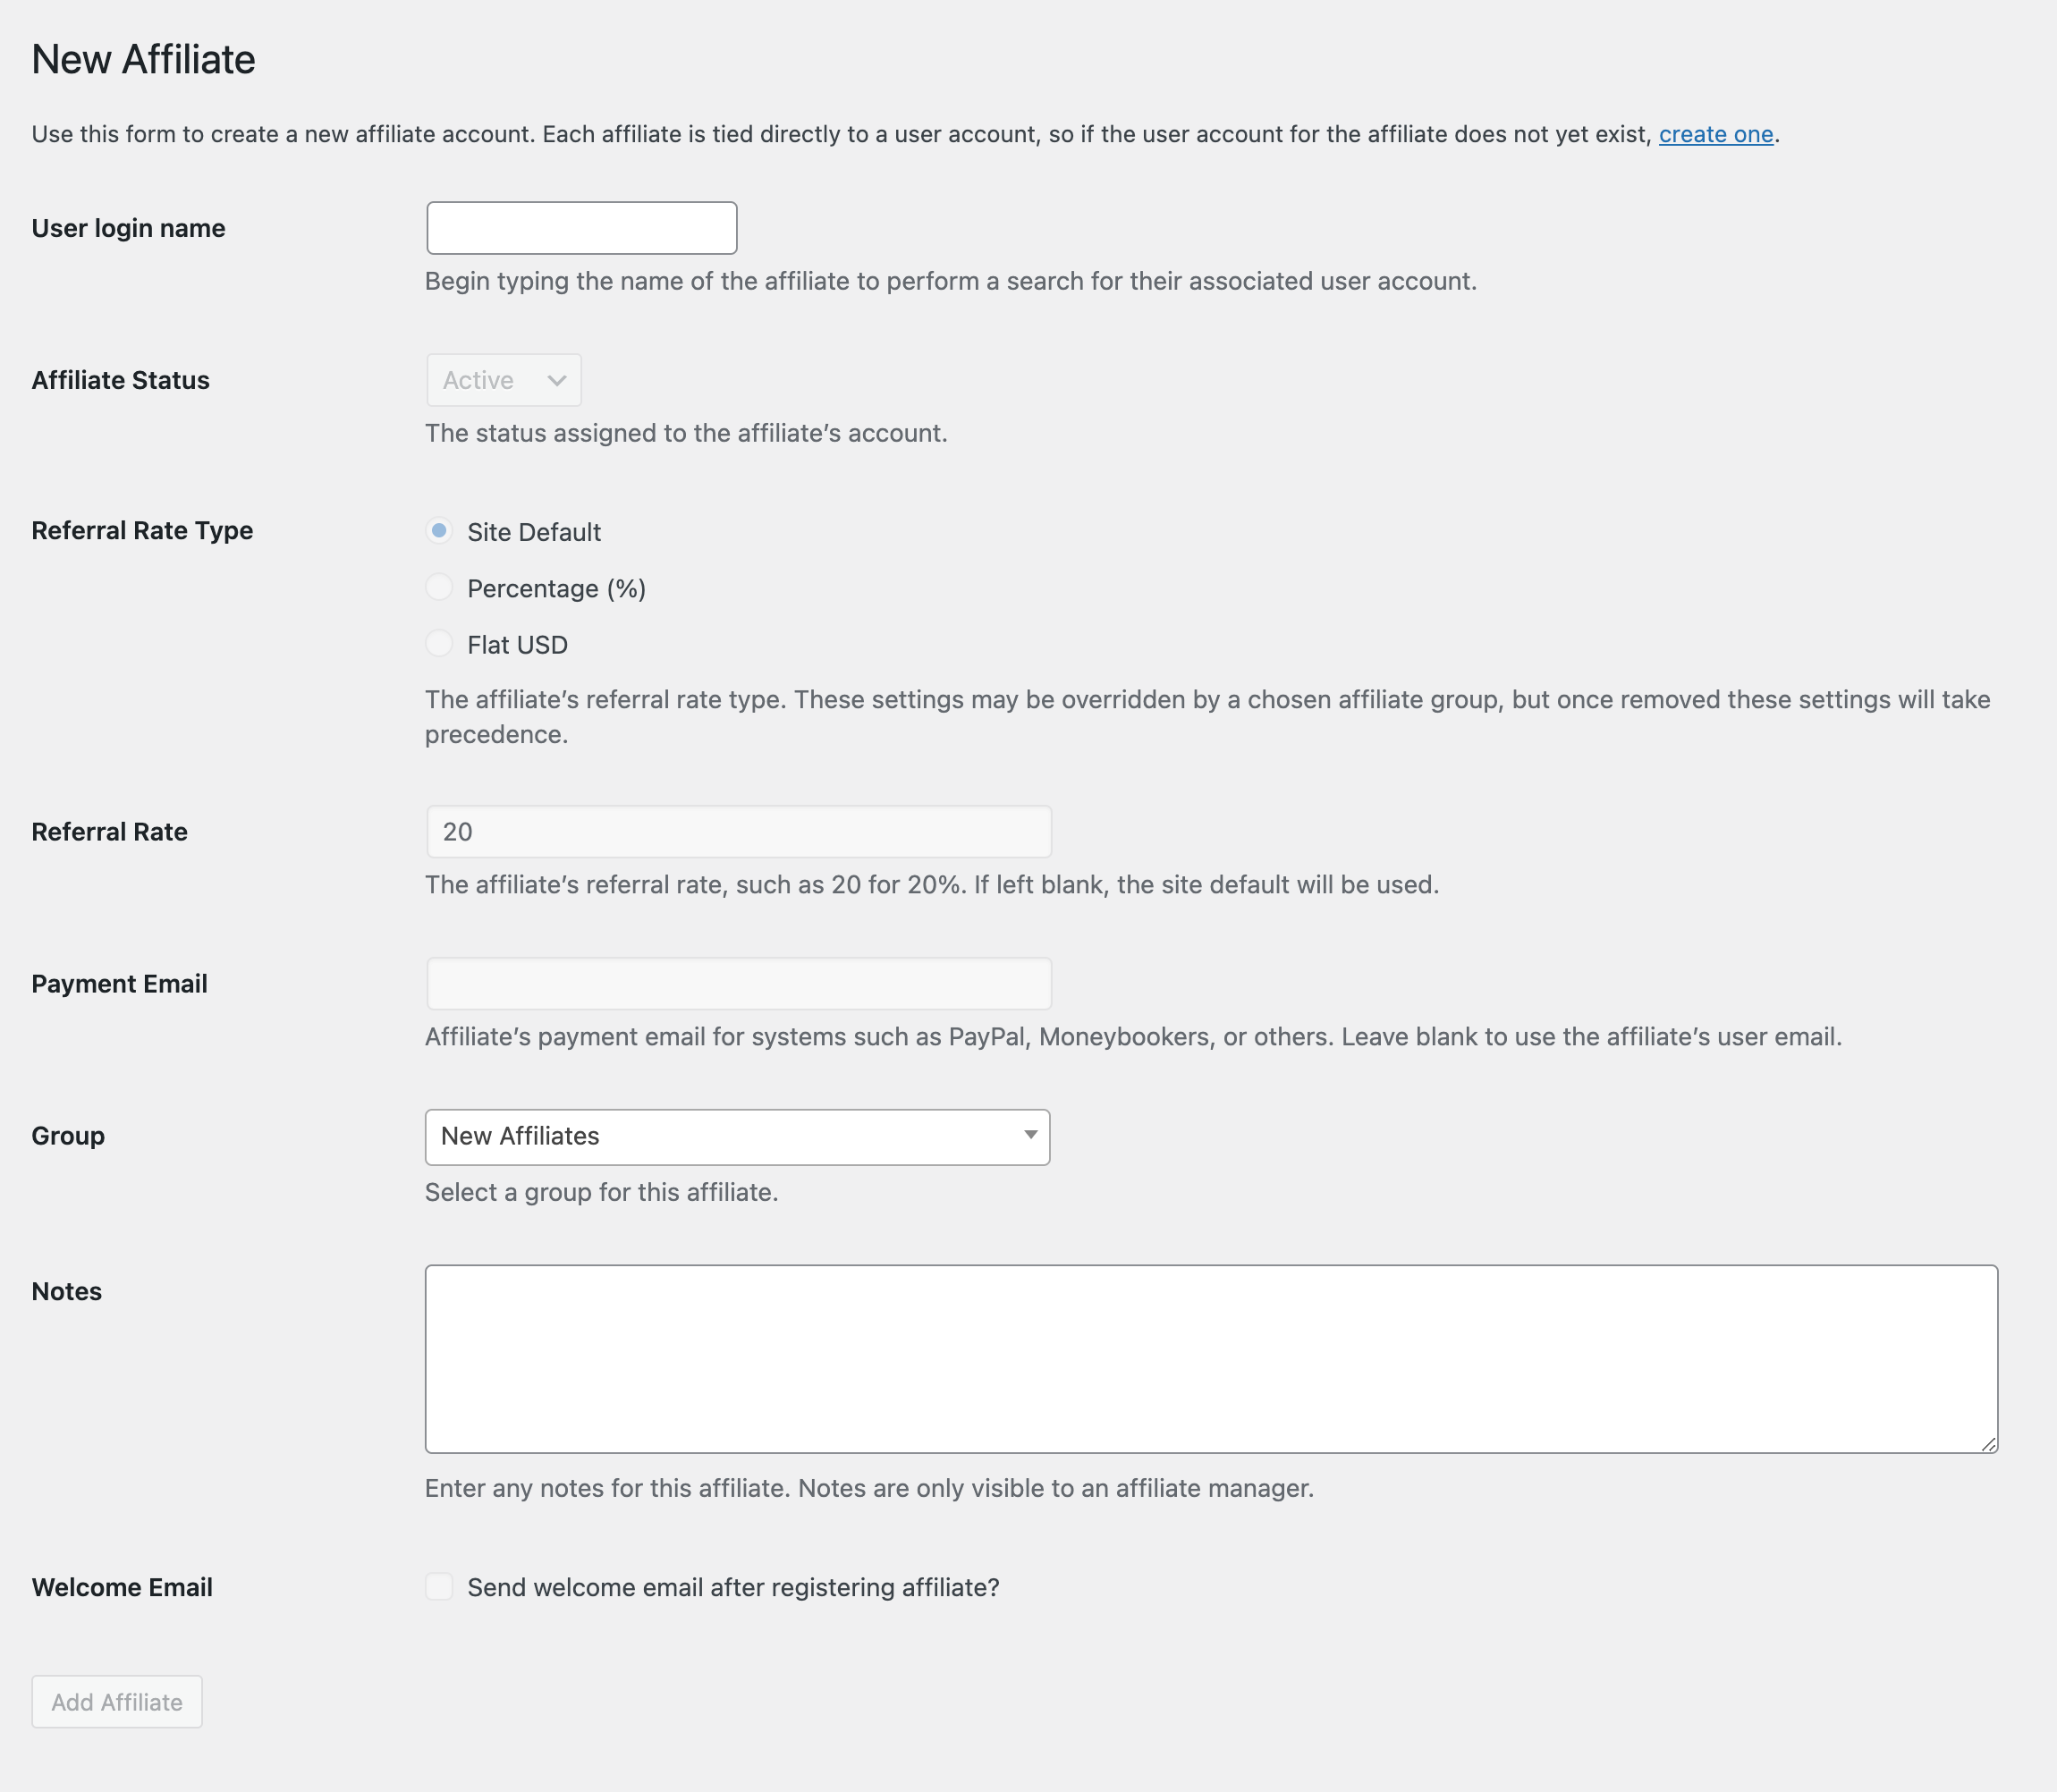
You will find a Group selection below the Affiliate Status section on the edit screen. Here, you can choose the appropriate affiliate group from the options in the dropdown menu.
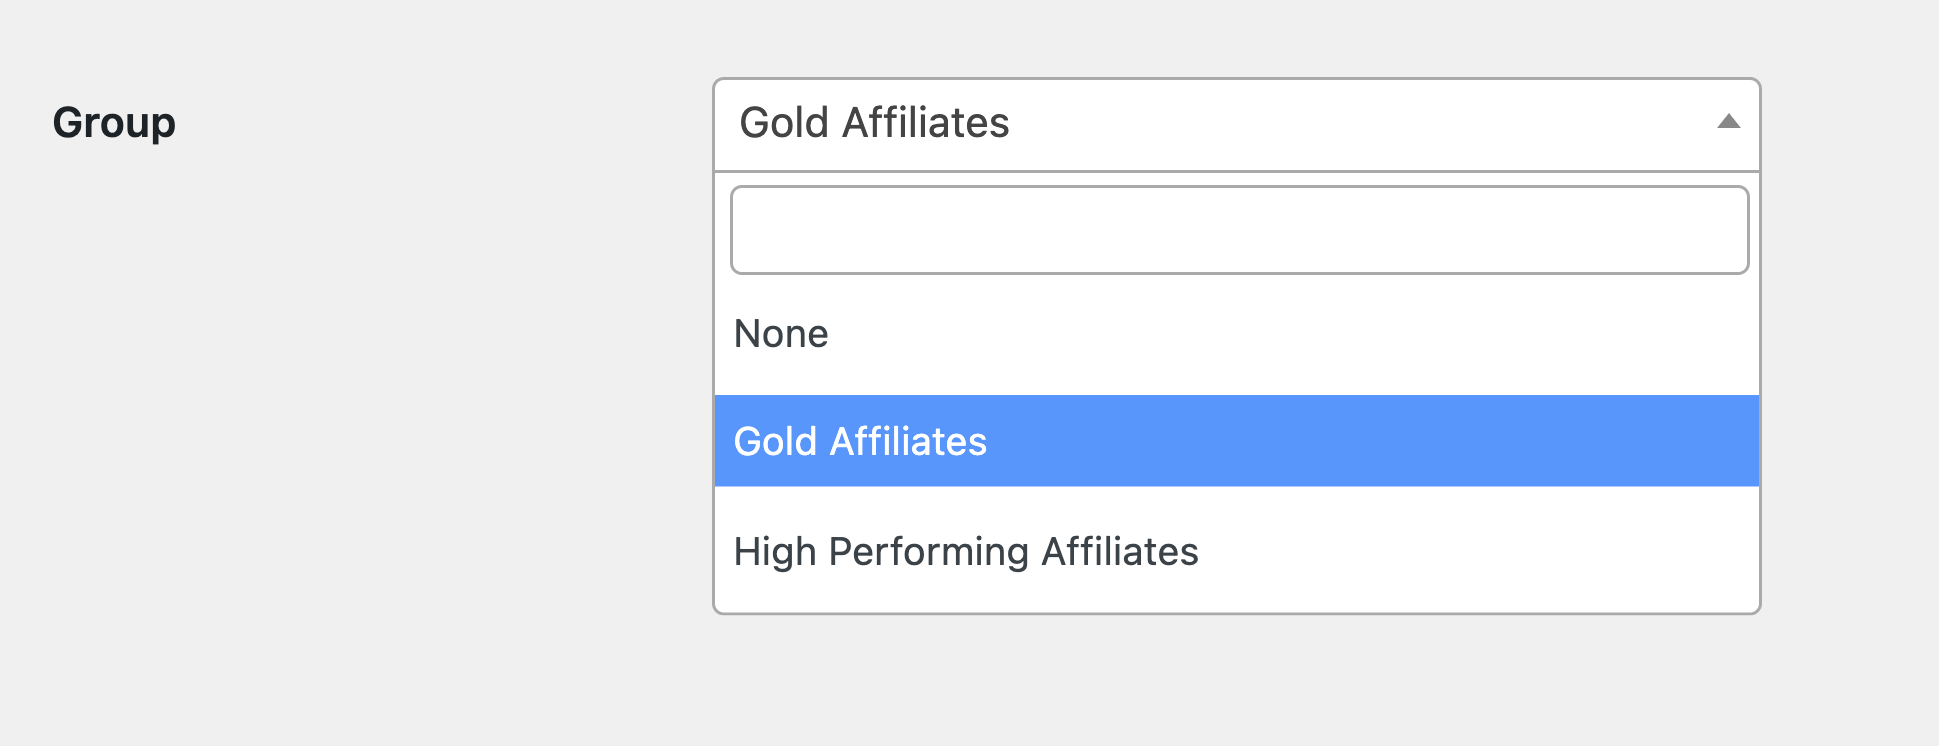
Note: Affiliates can only be associated with one group at a time and cannot be assigned to multiple groups.
After selecting the desired group, click Update Affiliate to save your changes.
Once affiliates have been added to their respective groups, you will see which group an affiliate belongs to when viewing the main affiliates screen at AffiliateWP » Affiliates.
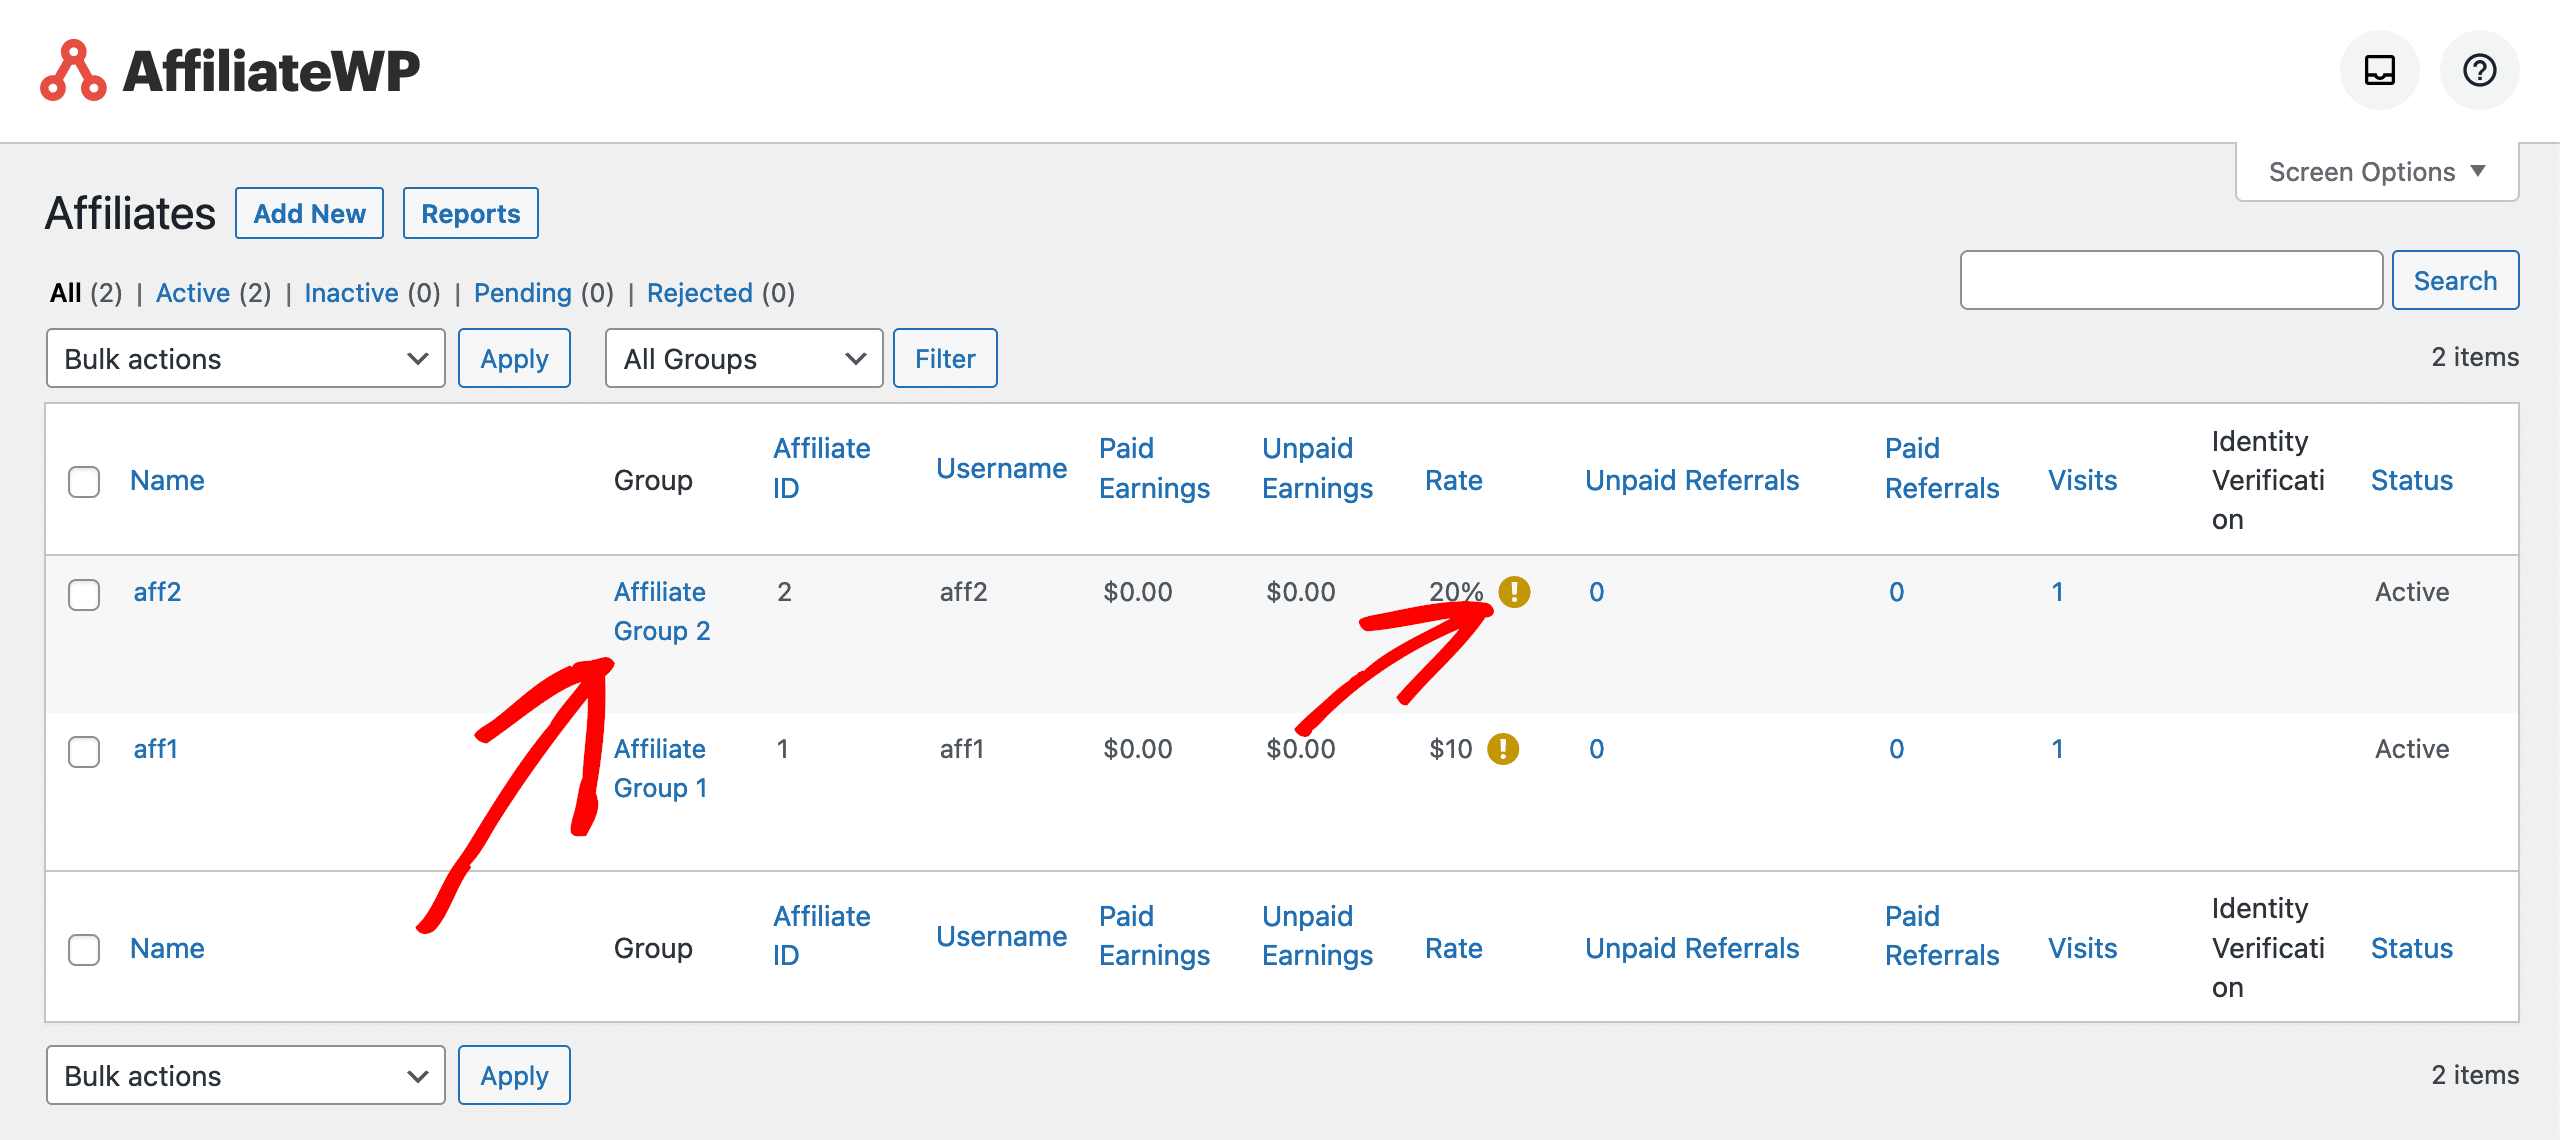
There will also be a notice bubble next to the affiliate rate, indicating that the affiliate is part of an affiliate group.
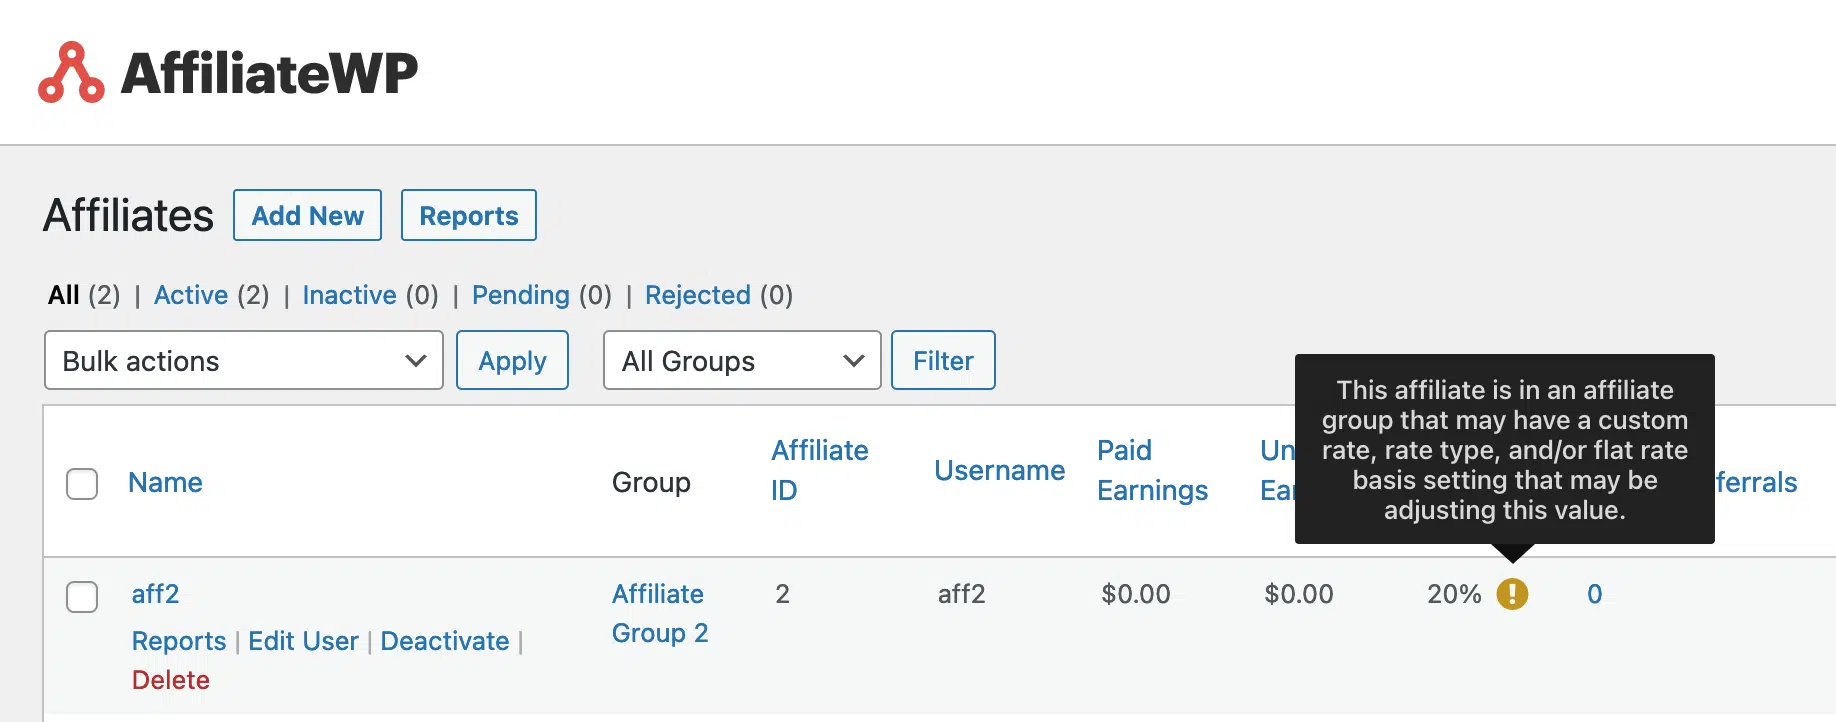
And that’s how easy it is to set different commission rates in WordPress for different affiliates.
Motivate Your Affiliates with Tailored Commission Rates
Now that you know how to create and assign affiliate groups, you can manage your affiliate program more effectively with AffiliateWP.
By setting different commission rates for different affiliates, you address the issue of a one-size-fits-all approach that often fails to motivate top performers and recognize varying contribution levels.
Remember, you can set a default group for new affiliates to ensure they are automatically assigned to a group upon registration. Each group can have its specific referral rate and type, giving you greater control over your commission structure.
Want to learn more? Check out our awesome resources:
- How to Integrate an Affiliate Program with Subscription-Based Products
- How to Create an Affiliate Program With Stripe (Guide)
- How To Set Up Flat Rate Commissions in Multi-Tier Affiliate Program
- 10+ Best WooCommerce Affiliate Plugins (2024)
- How To Setup a Multi-Tier Affiliate Program in WordPress (Guide)
So what are you waiting for? Don’t you want to see your business attract more customers?
Get Started With AffiliateWP Today!


